Handle Event Invitations
In chapter Inviting Other People we have learned how to invite other people to an event. This will send out invitation emails to all the participants with the event data attached. That allows one to directly accept or decline an event invitation.
Receive Event Invitations
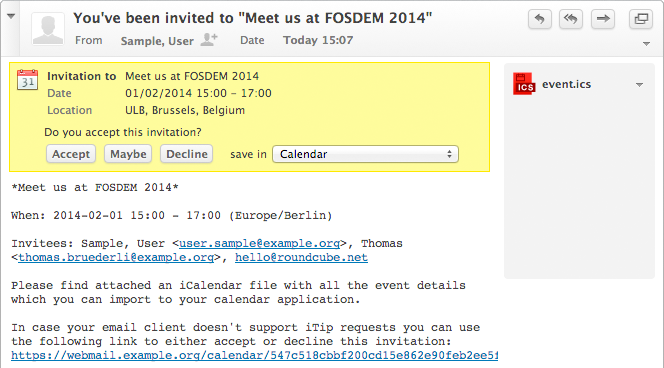
When the webmail system opens an invitation email with event data attached, it’ll display a yellow box in the preview pane or the email view:

Accept/Decline Invitations
Right in the box shown above, you can accept or decline the invitation by clicking the according button. This will send an automated response to the event organizer informing her about your decision and letting her update your participant status in her calendar.
In case you accept, by either clicking Accept or Maybe, this will also copy the event into your personal calendar. The selector right next to the buttons lets you choose the right one.
Note
It is sometimes useful (especially when declining or delegating an event) to respond without saving the event in your calendar. To do this use “–” entry in calendars selector.
The copy in your calendar now knows about the invitation and its original sender. If you now delete it from your calendar, you’ll be asked whether this should send a declination message to the person who organizes the event.
After acceping or declining, the email message containing the invitation can be deleted.
Process Invitation Replies
As an organizer who has invited others to an event, you’ll receive responses to the automatically sent invitations when the attendees either accept or decline them.
Such messages are also identified by the webmail system and again a yellow box appears in the message view:

By clicking the Update the participant’s status button, the original event in your calendar will be updated with the RSVP status from the person who responded here.
When you now look at the event details in the calendar view, the status icons next to each participant now displays the new status.